
BFF Academy · Pro course Pro course

Quick start: Your first client session

about 10 minutes Section 6 of 12

Recording

Tap + and choose Record Rider. Record the side first, then the front and the rear. The app usually auto-detects the direction, but you can manually change it in the top right corner.

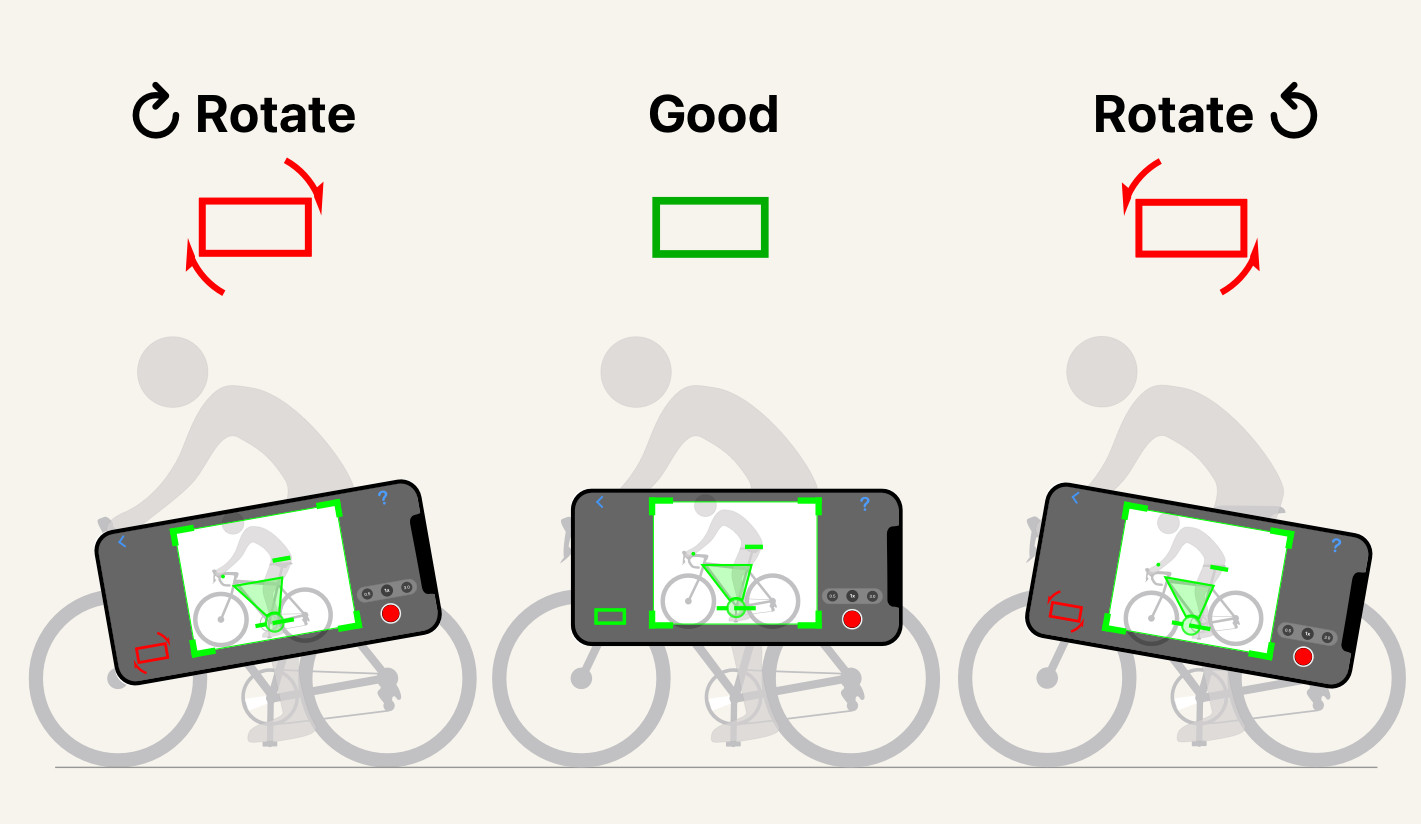
Use the green bike overlay and alignment aid (bottom left). You can film in portrait or landscape with your device. Set the camera at approximately the height of the top tube. Layer the green bike over the rider's bike as best you can to help with vertical and horizontal camera placement. Then, use the alignment aid to ensure the camera is level.
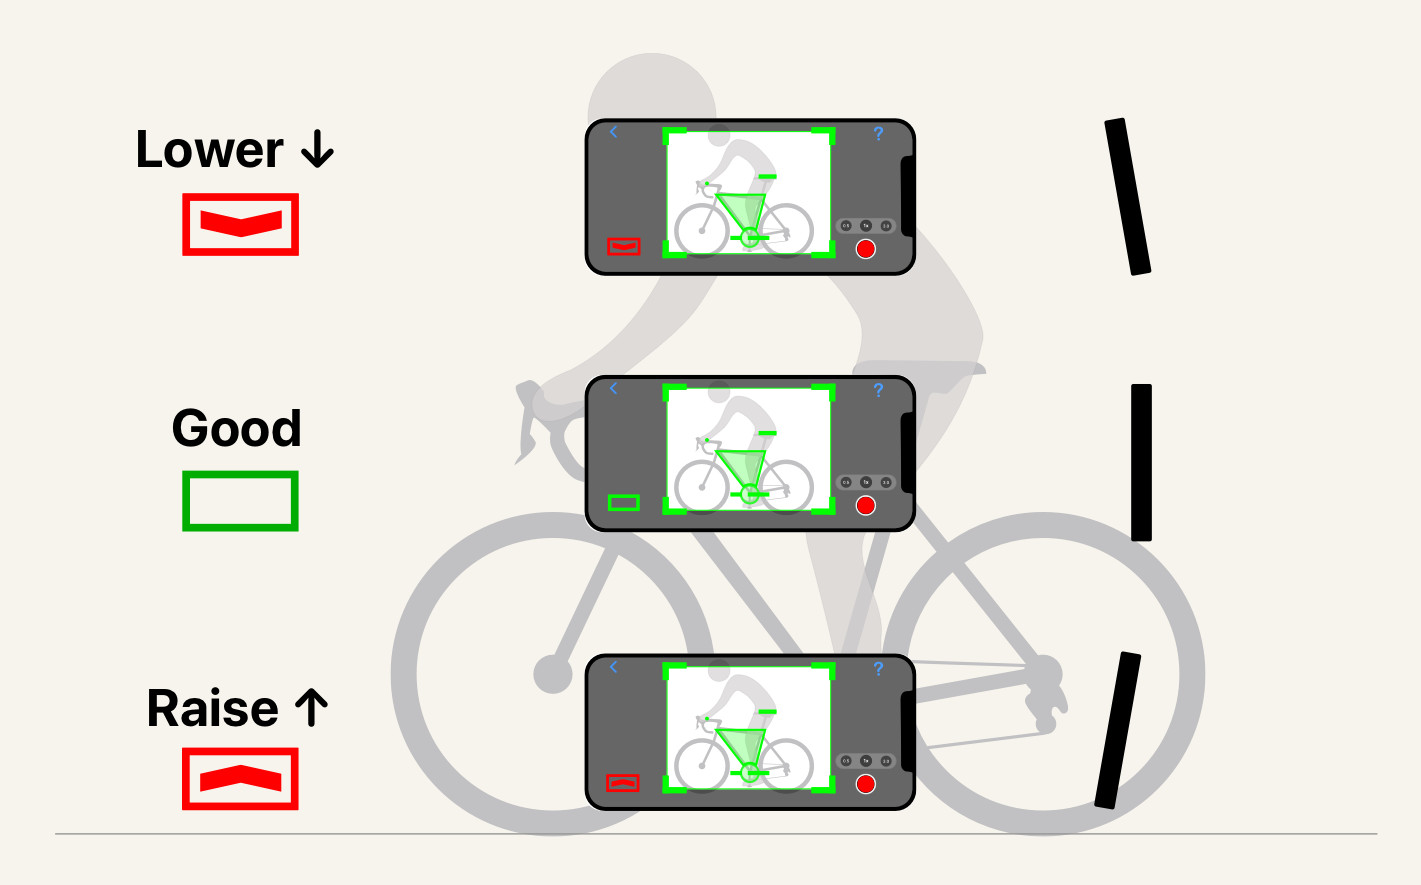
Match the bike's height. Set the camera at about the height of the bike's top tube. Too high and you shoot down at the bike, too low and you shoot up at it. Aim for the middle.
Keep the phone level. Hold it square, not tilted. A rotated camera throws off every angle the app measures.

Customize the Max Duration and Recording Delay. You can change the Max Duration to 5, 10 or 15 seconds, with a default of 3.5 seconds. The app also has a Recording Delay that can be pedal strokes (default: 10 pedal strokes), a length of time, or no delay.
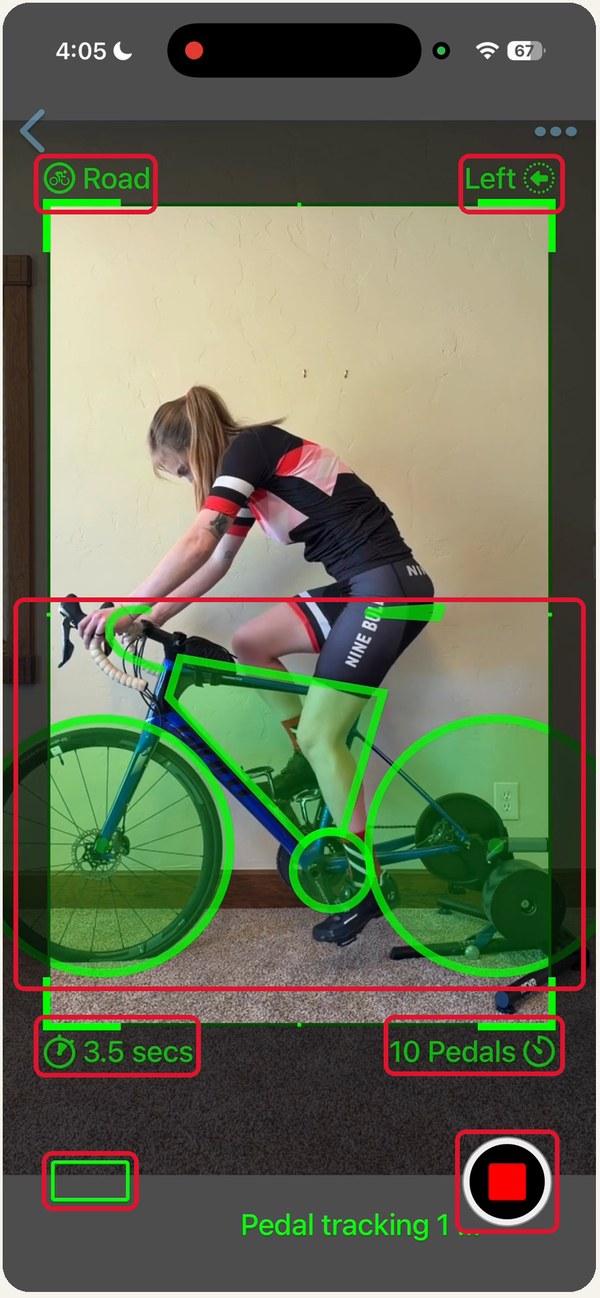
The recording screen, side view, with seven controls boxed: bike type, direction, the green bike overlay, max duration, recording delay, the alignment aid and the record button.
Tap a number on the photo to see what to check.
Was this section helpful?
Tell us more